Showing posts with label science. Show all posts

Making Art with Air

Hey y'all! It's Rachel from the tattooed teacher and I wanted to share a little art activity we do each year during our weather and air unit!


Sort of by accident I discovered bubbles make great weather art! We were blowing bubbles at recess one time and just seeing all the little spots on the concrete were they'd popped gave me an idea. So the next day we tried it...outside. Nope. Bubbles everywhere but the paper! So we ended up inside!

I had luck with mixing dish detergent, paint, and water to make the perfect blend to blow bubbles and have the pop onto our paper for a little art. This year for the life of me I could not get the mixture right, but we worked with what we had! Each student came over to the sink and blew as many bubbles onto their paper as they wanted. I tried to keep them from smearing and dripping, but they make for interesting pictures regardless. Sometimes I just gotta let go!
So here's my recipe for success...ok, here's my materials list!

After they dried all morning and we watched a little weather clip, I guided them through writing what type of weather their picture reminded them of. You can’t see my bubble picture in the shot, but it just had 2 perfectly popped bubbles with a little bit of “shrapnel” all over. I asked them to tell their reader about the “what”{the weather} and the “why” {they chose it}. I really love how different and unique they are, too!

Here's a little freebie to write their descriptions on! It doesn't have to be about weather either!


3

Marshmallow Shooters {Force & Motion} & a Freebie

We are having tons of fun with our new Force & Motion science unit. Today, I wanted to share a little about the Marshmallow Shooters I posted on Instagram. These were inexpensive and easy to make, but provided lots of fun learning opportunities!


Here's what you'll need:

Cups - I've seen others use paper cups, but I chose to use the cheap-o plastic cups. These were easy to cut and a little more sturdy. For added stability, I double stacked the cups for each shooter since there were 80 in my package.

My plan was just to squeeze the cups and cut the bottoms off. Yes, this would have left a little more of a jagged edge, but I have lots of cute duct tape and washi tape to take care of that.


However, Mr. Madden would not hear of it! So, he lovingly used a box cutter to cut the circle bottom out of all 48 cups we were using. #lovethatman


Balloons - Nothing special here. I picked up everything for this project at Target and the balloons in the party section were perfect. Just cut the top tip of the balloon off as seen in the photo below.


Marshmallows - Lots of mini marshmallows. Actually, you won't need too many - one bag was perfect since the marshmallows can be used over and over again.

**You could also use mini pom-poms if you have those at school already. Since they are less dense, they will not "shoot" as far, but that could be a good thing for this lesson. ;)


Here's what you'll do:

Tie a knot in the end of the balloon.Stretch the cut end of the balloon over the top of the cup...the lip of the cup will help hold the balloon in place.


Drop a marshmallow into the cup so that it falls into the little "hole" where the knot is. Pull the knot back, aim, and shoot! That's it!


Beware...these little shooters work better than I expected! My little scientists worked with a partner to use different strengths of force to shoot the marshmallows. Then, they used tape measures to measure the distance of their attempts. They didn't even know they were learning! ;)


When I do this lesson next year, I plan to do it outside so that I can draw "targets" on the sidewalk/pavement. This way students would be encouraged to use different strengths of force to reach the targets (with some being closer and some being farther away).

I would highly recommend this activity if you teach forces and motion. It was definitely a HIT!

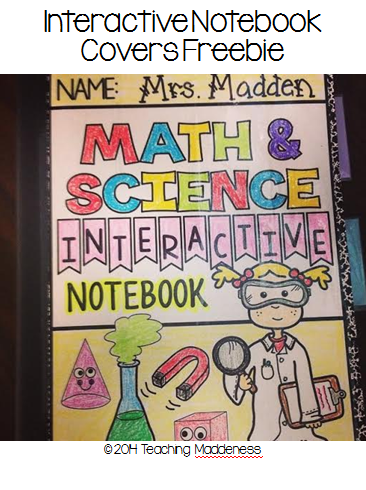
Of course, we recorded all of our results in our science notebooks. Here's the cover that I promised some of my IG followers. I use a composition notebook with a tab to divide it - half for math and half for science - but I've included an all-science version, too. I hope you can use it!

https://drive.google.com/file/d/0B7-RC8er5CXTWURPY2R4UU5FUWc/view?usp=sharing


33

Introducing Science (freebie)

Hey y'all! It's Rachel from the tattooed teacher! and this week we are focusing on PRE-science class!
It may sound strange, but I spend a week "introducing" science class to my second graders! Yes, science is one of their favorite subjects (my favorite to teach), however, do they communicate about it effectively? No!
At my school we are SO LUCKY to have a science kit for most units. But before we delve into our first unit this year, we learn all about Process Skills!
There are tons of great ways to teach and practice these essential skills!
I wanted to share one of my favorite lessons that I actually found in an ancient science workbook my first year teaching!
I still use it every year!
I call it Stinky Feet Science!
I love this lesson because 1.I do not have to buy a thing-we all have shoes on
and 2. shoes stink and that makes kids laugh and enjoy this activity even more!

So here is how I introduce classifying to my students using their shoes...


aren't they funny!

you can download this freebie here!

and if you're interested in what else we do...check out Teaching Process Skills to Wee Scientists! 


2

Spring Fling Day 5 Freebie!


Happy Spring everybody!  It's Linda from Around the Kampfire 
popping in to share a springtime FREEBIE along with some fun ways
to get your kids writing about science!


Spring means planting time and life cycles in my classroom!
We begin by learning all about the Life Cycle of Plants.
During our plant unit we question, predict, observe, and write!


This big spring bundle is loaded with lesson visuals, mini-labs, 
reading comprehension, informational writing, graphic organizers, 
observation journals, diagrams, vocabulary cards, anchor charts and a 
culminating foldable flower project book perfect for assessment or 
an adorable open house and hallway display! 
You can find these Life Cycle of Plants activities and so much more 
in my TeachersPayTeachers store!


Here's a little Spring FREEBIE for your science wall!  


You can download these anchor charts {HERE}
Stop by and see all of the fun things we did with this unit 
in my classroom {HERE}!

Need more spring resources?  Check out the linky below!


0

Johnny Appleseed Mini Unit

It's Gina from Beach Sand and Lesson Plans here!

The official start of fall is just around the corner. Sadly, here in South Florida we don't get to experience the leaves changing or cooler weather. It's still HOT here and the palm fronds are green as ever. Even so, I enjoy bringing a little fall into my classroom. After all, it's my favorite season. Apples and Johnny Appleseed are my way of ringing in the season!

I created 5 activities that are perfect for a one or two day study.


During our reader's workshop time, I used this book by Jane Yolen, as our mentor text, Johnny Appleseed: The Legend and the Truth. 
I had the students fill out the "What I think I Know" section of this organizer first. We then discussed what is meant by a legend and why the book might have the subtitle "The Legend and the Truth". I told them we would discover as we read together. The rest of the chart will be filled out after reading.

I put the book under the doc camera so the kids could see the text as I was reading. I wanted to keep this more of a whole group activity since we are only spending about 2 days on it. They enjoyed the discussion and finding the facts as we read. During our next reading time, I will have them discuss the legend/truth part of this organizer prior to our group discussion.


I was able to connect the apple topic to our current science lesson. We have been talking about how scientists use their senses to make observations and then use those observations to make inferences. I set up the kids in groups of 4 and gave each group 3 different apples. They observed the outside of the apple first. I let them talk together. We shared adjectives that would make sense when talking about an apple. 


This group got a little surprise. When I took their Red Delicious out of the bag. It was ROTTEN on the top....really gross! The group was able to make a great inference based on their observation and they were right! The inside was just as rotten!
After they observed the outside, I cut each apple one at a time. They carefully looked at the seeds, the core, and then had a taste. It is such a simple activity and they had a blast! The gloves made them feel like little scientists! LOL!

They recorded their observations on this form.


In their science notebooks, they drew this diagram and labeled the parts of the apple.

 The last two activities in my mini unit are an opinion writing prompt and a sheet to label the life cycle of the apple. The 5 activities can also be used during a study of plants, a study of tall tales or pioneers, or even Arbor Day. Johnny Appleseed is not exclusive to the fall!

Hope you enjoy! Happy fall!


0
Back to Top