Organizing Classroom Volunteers: The Easy Way!


Hi friends!  It's Linda from Around the Kampfire!  I thought I'd 
share the easiest way I've found to schedule and organize
my parent volunteers! 


I discovered this free site a couple of years ago and have used it for everything from scheduling classroom volunteers and field trip chaperones to donating items for special projects and events.  I even use it to schedule my parent/ teacher conferences!  It's that easy!

Here's a little tutorial on how VolunteerSpot works:  Go to www.volunteerspot.com 
and create a free account.


From there, you click on Create New Activity.


Choose the type of activity you'd like to plan.  For one time events
I choose Single Day for monthly volunteering I choose Multiple Days.


Name your activity and enter all the details.


Next, click on a date to plan it!

Enter the email addresses of those you wish to invite, 
include a message and INVITE!


You can view and edit the activities you've got planned...


Then print a report of who is scheduled and when!
This part is especially helpful for parent/teacher conferences!

And here's the best part.....parents receive an email reminder the day before!
 That alone saves me a ton of time! 


Hop on over to my home blog, Around the Kampfire, to see
how I make the most of my volunteers' time once they arrive! 


3

My Classroom Organization Must Haves!


I have some "go to" organizational ideas that have always helped me stay sane (well, at least enough to keep it all together - LOL!).  I wanted to share them with you in the hopes that you'll be able to use them as well!

For me, student papers drive me crazy UNLESS you have a organized system of keeping up with all of it.  Here's how I organize center recording papers (before students ever touch them).
I have labeled baskets (which are also colored-coded by subject) to keep recording sheets and any other center materials.  Click the picture above for free center labels!

When students are finished, they put their work in this pocket chart (labeled with their student number).
At the end of each week, students put their papers in order (written on the board), I staple them, and take them home to grade.  It's MUCH easier when all the papers are in the same order.  I can check the top sheet of everyone's center work and then flip to the second when I'm ready.

When I'm finished grading, I put their papers in these mailboxes (again, labeled with student numbers).
On Fridays, students come to their mailboxes, take out their graded work, and put it in their Friday Folders to go home to their parents.  This system keeps the paper monster to a minimum! ;)

I also keep some of the students work and forms in this crate system:
When I have to go to an RTI meeting or have a parent meeting, the important "stuff" is right there and easily accessible!

Another thing I have to do is keep MYSELF organized!  Here are some of my tips:
I keep a weekly planner and an accordion file with me at all times!  If I want to check my schedule or file an idea away, I have the tools I need to do so.  
Keep track of important dates and events with a cute desk calendar.  Don't get an ugly one...you'll start to resent it just as much as all those extra meetings.

Finally, I wanted to share a video and resource I shared a few weeks ago on my blog.  Here is the video:

Also, here is the link to a checklist freebie that goes along with the video:
 I hope all of this info is helpful and isn't too overwhelming.  Good luck getting organized!  And remember, the kids can do a lot to help keep things organized!  

The more help from the kids, the less stress on you!

1

Organizing Math Centers

Hey there!  It's Nicole from Teaching With Style.  Today I'm going to share how I organize math centers in my classroom.

Last summer, a bunch of bloggers read the book Math Work Stations by Debbie Diller. I read the posts, ordered the book, read it, and became intrigued.

My old school had a math program with a strong center-based component.  My new school's math program centers are terrible.  I knew that I wanted to start math stations in my room.  At first, I was overwhelmed - new school, new grade, new curriculum, AND implementing something I've never done.  But, with some organization, I was able to easily set it up!

Here is where I keep my math centers - in a closet.  When I taught 3rd, I used these drawers on student tables (I didn't have desks) to hold their folders and supplies.  When I moved, I brought them with (since I bought them) but wasn't sure how I would use them.  They've been perfect for centers!  

At the beginning of the year, I let kids pick their math partner.  After I get to know the kids' math skills better, I will assign partners.  Since I have 15 kids during math time (2 leave for resource), I have six groups of two and one group of three - giving me 7 different math centers.  The drawers come in 3's, so I actually have 9 centers set up with 2 out of rotation each day.


One of the first chapters of Debbie Diller's book is how to clean out your supplies and organize for math instruction.  Here are some supplemental supplies I have.  Most are from Donorschoose.  On the top shelf: geoboards, buttons, foam dice (free from Highlights Magazine), bucket of bug manipulatives, colorful buttons.  Behind (you can't see) are more dice (from the Dollar Tree), and two more buckets of manipulatives: sea creatures and jungle creatures.  Under that top shelf are math games that make a quick center: geoboard patterns, 3-D and 2-D shape puzzles, fraction puzzles, and a math intervention kit that I plan to use with small groups in a couple of weeks.  Along the side of the drawers are clear bins of other manipulatives: fraction pieces, money, rubber bands, colored tiles, and teddy bear counters.


Inside the drawers are the games.  I love using games from TpT!  Right now, I have games from Fern Smith's Classroom Ideas and The Teachers' Cauldron!


I keep a center cover, recording sheets, cards, and manipulatives all in the drawer.  I keep the cards in a plastic page protector, where I write the center name and standard on the white part.  That way when I put the center materials back in my filing cabinet, it's easy to see what it is and which standard.


Interested in getting started with organizing your math supplies and centers?  You can check out my supply labels and also my new QR Code Addition centers!


How to do organize your math supplies?
4

Organizing Birthdays

Hi! I'm Courtney from Swimming into Second.


I am bringing you a simple idea today to help make your life easier all throughout the year. I don't know why I didn't think of this before but I'm sure some of you already do this. I am terrible about remembering when my students' birthdays are. I always have them on the calendar but I totally forget to get their gifts ready before the big day. So this year,  I decided to get it all ready at the same time.


 I found some small manila envelopes in my classroom. I decided to use those to hold each students' birthday treats. I got some stickers from Teacher Created Resources to put on the outside.

Inside, I put their birthday swag including a sticker, a birthday pencil, and a birthday brag tag.

I also put some birthday certificates in the envelopes after I knew their birthdays. I also wrote their names and birthdays on the outside of the envelope and put them in order. 

Voila! Super easy to get ready and implement in the classroom. 

 I hope you come visit me at my other home, Swimming into Second. I am currently having a Show Off Your Space linky party and it's full of great classroom photos. Come check it out!


1

Sub Tub and Sub Binder

Hey everyone! Ms. T  here and ready to help you get that sub tub ready so you don't have to fret. Funny that Fern talked about getting your desk ready for a sub and being organized, because this is a great segue!

1. Sub Tub basics
I can tell you it is a sub's not so fun reality when they go in a class and there are no lesson plans. We understand that sometimes emergencies happen, but you can prepare as much as you can with a sub tub (or box/binder). Some teachers I sub for have these all set up. It has the class procedures, behavior management, phone numbers of teachers/school employees, and a generic sub plan. Sometimes there are special read aloud books and activities tucked in, that aren't normally done on a regular basis, that make things even more special.  I even subbed for a teacher that five days worth of stuff ready just in case!

2. Have a seating chart (if your class is set up that way) and a class roster. It's super helpful as a sub to be able to memorize a few names or to jot down notes of super helpful kids or the kids that need reminders.

3.Get extra work ready just in case.  Whether it's a word search, an extra worksheet, fun books to read, an art activity, etc., having extra work is always helpful. I know I'd rather have too much stuff to do than not enough. If you don't have a sub that often, an art activity may seem extra special.

4.A schedule of the day. I know that teachers can't always stick straight to the schedule, but to have a general idea and to know when the important times that cannot be missed are, it's very helpful.

5.A list of your management tips.  I can be in many different schools and a lot of them have similar behavior management styles but there are different ones. One school has everyone clap to get attention, some teachers have a bell, chimes, word signal, etc. Some teachers have behavior cards, punch cards, clips, etc. It's nice to know what you do for behavior management and how you get the kids' attention. Familiarity and routine for the kids also helps the day go smoother for both them and the sub!


Some of these may seem very basic, but when they come together, become a great sub plan for your substitutes! 

On my blog, I do have some sub tub freebies.  I did bring a freebie over here for you all! An editable one!


Similar to my other sub binder but different design and it is editable!!!! 

***Just insert a text box over what you want to type and you are set! ***


6

Getting Organized: Go Digital!

Hi friends!  It's Jamie from 2nd Grade Stuff.  I'm hoppin' over here today to share a few tips on organization with you - the digital way!  I hope you find them useful!


First, let me just explain that one of my favorite all-time tools to use to stay organized is my iPad.  I literally take it everywhere I go.  I actually was able to coordinate this entire blog post on the iPad with the use of screenshots, photo apps, and such.  The iPad is one fabulous tool!  So let me share with you how my iPad keeps me organized in the classroom!  Please note: I am not getting paid to endorse any of these apps or products.  I just think they are super useful and wanted to share!

Awesome Tip #1:

I can't tell you enough how much I LOVE this app.  I originally found this app when the sweet girl behind Ladybug's Teacher Files blogged about it {HERE}.  Her post is extremely detailed and helpful.  I purchased the app and couldn't be more pleased.  It houses all of my students' grades, attendance and anecdotal records.  It is FABULOUS and secure because it backs up to your Dropbox, which I will talk about later!  Here are some screenshots.  You can add custom color-coding, percentage scores, text scores, icons, symbols, anecdotal notes, and more!  But it's also simple enough to be used as a simple gradebook with student scores only.  Check it out below to get an idea of what it looks like.  If there's anything you want to do on this app in regards to student records, it CAN be done!

Attendance:

Awesome Tip #2:

I've went back and forth between this online lesson planning format and another, but I have decided this one is my favorite.  It is completely compatible with the iPad.  While there's not an app for it, it can easily be opened in Safari and you can edit your lesson plans from anywhere!  I literally worked on my lesson plans in the waiting room of the doctor's office the other day!  My favorite part of this online lesson planner is the ability to tag the Common Core Standards or state standards you are using right from the website.  Brilliant!  Check it out below.

This is my basic template/skeleton.  You click on each box and just fill in the details for that week.  This is what the lesson planner looks like on my iPad.  This is my template for the week.  I fill in activities, assessments, and CCSS each week.

This is what it looks like on the iPad whenever you click on one of the boxes above to edit:
This ability to "Bump" lessons to the next day is brilliant!  It also allows you to attach files and hyperlinks to your lesson plans.  Check this awesome online lesson planner out {HERE}.  It makes it easy to collaborate with teammates as you work on plans together.  You can also print out your plans as a pdf or email them to administration or co-workers.

Awesome Tip #3:
Organizing Your Files with Dropbox!

I've had lots of questions about how I organize all of my TPT files and school files on my devices.  One word: Dropbox!  It is seriously the BEST online file management system I have found.  I can add something to my Dropbox and it syncs to my home computer, laptop, iPad, and iPhone - amazing!  It's free for a great deal of space, then if you want more, you have to pay for it, but it will take a LOT to fill up the free amount of space.

I organize my files in several ways.  First, I organize in folders by subject: Reading, Math, Science, Social Studies, etc.  You can see that below on the iPad app:


I also have folders for monthly themes.  Because of this, I sometimes have things double-saved, once in my Reading folder and another time in my August/Back to School folder.  But this way, I don't get lost in a sea of files and forget what I have!  I also named my monthly theme folders with a number in the front so that they are in order.  Otherwise, they would be in alphabetical order and April would be first on the list and my OCD I couldn't handle that.  This way they're in order of months of the school year!  So easy that way!  See what I mean below:


Awesome Tip #4:

This one is good y'all!  In combination with Dropbox (above), this app turns your classroom into AMAZING!  I normally use a stylus, but it was at school tonight, so please excuse the terrible writing with my finger.  But here's how it works.  I open up the pdf file I want to display on the ActivBoard in Dropbox.  Then I touch the little arrow in the top right corner and touch Open In... then I choose Notability.   This opens up the entire pdf file in an app that lets you write, highlight, type, circle, draw, etc. on the actual pdf document.  The best part is that I can walk around my classroom and display it from my iPad and let the students hold the iPad and stylus and work on things in collaboration using an Apple TV or other mirroring application on your computer attached to the ActivBoard.  It's amazing!  I can literally walk around and model writing or let students pass around the iPad in the classroom and display it for all to see.  It has really changed the way I teach!  Love being able to have that proximity, but still teach at the same time right from my iPad.  This is what the students see displayed on the board (you can see I can write, highlight, and type):


Awesome Tip #5:

Talk about having curriculum right at your fingertips!  I LOVE, LOVE, LOVE this app and it's FREE!  I am a content/curriculum freak (self-proclaimed) and I love being able to have the standards right there at my fingertips anytime I need them.  This app is for the iPhone or iPad, so while you're lesson planning, hop on over to the Common Core app to make sure you're covering all your standards!  Love it!  Here are some screenshots:


Using all 5 of these awesome techy tips helps me stay super organized in my teaching.  I can literally work from my iPad anywhere!  With the Common Core app, my online lesson plans, my grade book app, and Dropbox, I don't have to go anywhere else to work!  Then when I get to school, I can teach right from it too in Notability!  It's all right here for me on the iPad - NICE and ORGANIZED!  I hope you find some of these techy organizational tools helpful for you!  :)
43

Organizing Testing Data

Hey, hey ladies! It's Megan from I Teach. What's Your Super Power?  I'm here today to share a little organizational gem with you.

It's back to school time. Which means you are currently DROWNING in paperwork.  Yea for being a teacher, right?  Just when you think you may have a handle on the beginning of the year paperwork, it's time for literacy assessments.  More paper.

You know the worst part of beginning of the year assessments?  No, not hearing 44 kids read the same fluency passage. It's all the forms you need.  And don't have.  And can't find.  And forgot to make copies of.  And where are those DRA books?  That to me is always the worst.  Then I'd get started late, be rushed, frustrated.  All lovely feelings to throw into the beginning of the year mix. But a couple of years ago I figured out answer.  The box.  A lovely, simple, white Ikea magazine box.  This beauty has everything I need.  Take a look:
I didn't say this organization was rocket science.  But it is efficient. I have a folder for our fluency screener and another folder for our quick phonics screener.  Each folder has a million copies of the recording sheet and several of the student sheet.  Behind those folders are folders for each DRA level that I might possibly need. The last folder holds originals of everything. You ever notice that if you put the original in with the copies you use, you inevitably use the original? Not this girl.

This last picture shows how I made sure I get all the tests in that I need. In our district, all third and fourth graders take the fluency assessment. ESL kiddos and at risk kids are also assessed using the DRA and a quick phonics screener. I make one sticky note for each of my sections to keep track of what I still need to do. (I made fake sticky notes for privacy.)  Again, not rocket science, but it made my reading assessments much less stressful to manage.

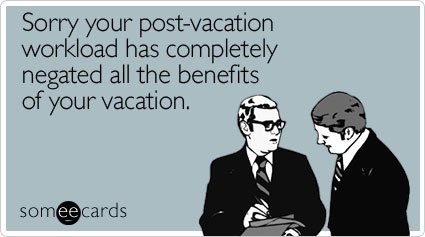
Here's a little back to school laugh for you:
someecards.com - Sorry your post-vacation workload has completely negated all the benefits of your vacation

That about sums back to school time up, right?  Hope you'll stop by and visit me sometime.
I Teach. What's Your Super Power?

Happy organizing!

3
Back to Top